The Sideswiper
Ik gebruik twee lagers omdat er op deze manier weinig speling in zit.
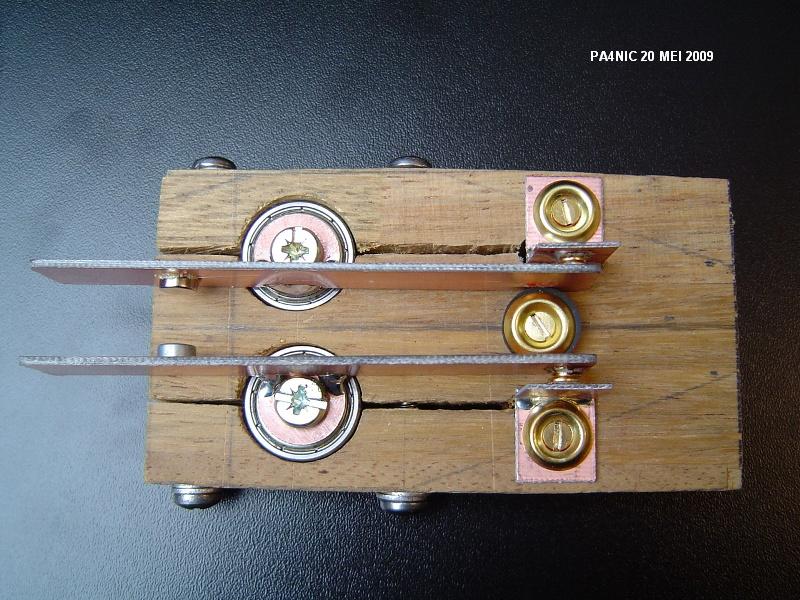
De onderzijde voorzien van ruimte voor de draden en bevestiging.
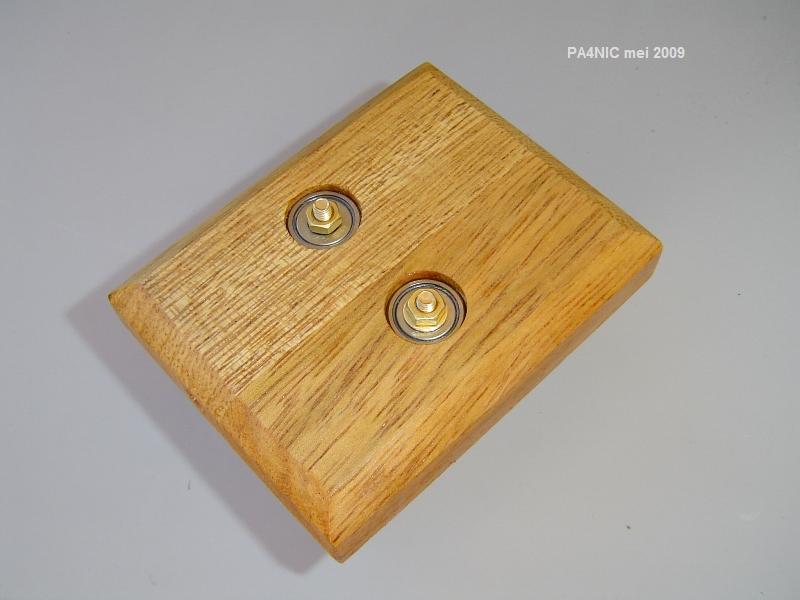
De onderzijde maar nu klaar, alleen het lood (gewicht) nog.
De boven zijde, nu de magneten en de kontaktpunten nog monteren.
De zelf gemaakte contacten, het is het bewegende contact uit een relais.. leuk he!!
Niet alleen Twin-Paddles maar ook een "Straight Key" werd mijn uitdaging. Links de magneetjes en rechts de contacten die uit een oud relais komen, gesoldeerd op messing boutjes.
Zoals ik al vermelde begon het allemaal met een noten houten blokje (latere modellen Merbau). Paddle 1
Bedraad en in gebruik, even wennen aan de lichte (tegen)druk van de 2 magneetjes.
Paddle 2
Alleen de bedrading nog en ook deze is weer klaar, magneten zijn nu verstelbaar!!
Paddle 3
Met hulp van Gerard PA2HLM kon ik de 3e paddle maken. Hier liggen de lagers mooi in lijn en is de as speling vrij
Paddle 4
Opnieuw uit de hand geboord maar nu de lagers (2 per boutje ) in de 2 componenten lijm gezet, dit werkt goed.
Paddle 5
Hier probeerde ik het toch nog eens met 1 lager, maar helaas...
Paddle 6
Vanwege de speling van boven staande (5) probeerde ik dat model nog eens met 2 dubbele lagers.
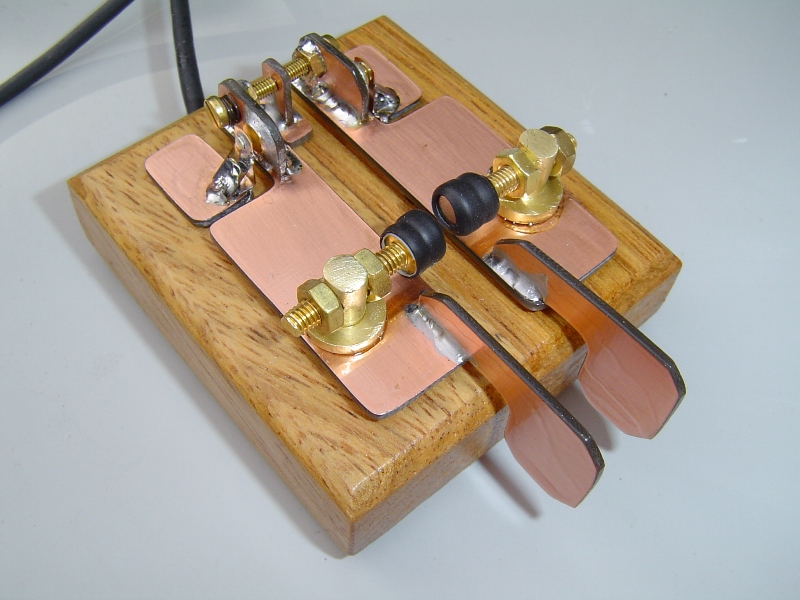
De Straight Key
De sleutel is (op de bedrading en de afdekplaatjes voor de lagers na) klaar voor gebruik.
Paddle 7
Deze Paddle is mijn favoriet, ik vind hem tot nu toe de mooiste.
Paddle 8... "juweel kistje"
In de "CW Ronde" (info hier) gaf Jos PA3GDF hem de naam "Het duveltje in 't doosje" (dat was voor hij hem zag)
Verder volgen er nog enkele details, het elektrische gereedschap wat ik gebruik zijn een boormachine
De console is met enige precisie gemaakt
De afstelling voor de hefboom (van een boutje vijlde ik de kop wat af).
De 2 elkaar afstotende magneetjes (afstelbaar door de knop er boven).
Verder nog wat foto die tijdens de bouw gemaakt zijn. Even denken hoe ik de paddles zelf moet vormen.
Kijk eens goed naar deze puzzel want het gaat natuurlijk niet geheel vanzelf...
Met staalwol opgepoetst en dan in de spuitlak.
Closeup van de magneetjes en inderdaad weer op een nieuwe plek.
Nog even de onderzijde, plaatjes lood om het geheel iets te verzwaren loste ik zo op...
De eerste paddle... even nadenken en aan de slag, in de schuur lag nog wel een plankje. De evt. sokkel kan gemaakt worden van een dekseltje vol met lood o.i.d. (loste ik later anders op).
Zo dat past mooi (is nog maar het begin).
De magneetjes stoten elkaar af, dit pas ik zo niet meer toe omdat de druk oploopt tijdens het indrukken. De contacten zijn van een oude Motorola accu (laadcontacten).
De Paddle werkt als een speer, zeer licht en verschuift daardoor ook niet snel.
Closeup van de (vergulde) contacten.
De volgende... De 2de paddle die ik maakte is iets anders (net als allen die volgden hihi).
Eerst alles op maat maken en je leert van het bouwen, de contacten zijn van een groot relais.
Lagers staan nu in de 2 componenten lijm.
De bedrading is verzonken dus wordt niet afgekneld.
Ook dit moest met enig beleid (inmiddels frees ik het uit met de bovenfrees).
De 3 plaatjes lood voor onder de sokkel netjes en vlak verlijmen, hierna 4 zachte anti schuif dopjes.
Contacten, moertjes en dubbelzijdige printplaat uiterst zorgvuldig bemeten en vervaardigd!
v.l.n.r. magneetjes, lagers, contacten aanslagnokjes.
Hier is de ruimte gemaakt voor de bedrading, later schroefde ik er plaatjes lood onder.
Nog even een foto waar je kunt zien hoe klein het sleuteltje is.
Zo maakte ik de sokkel van de Nic-13 lekker zwaar.
De bedrading van de Nic-13.
Paddle Nic-13 met passen en meten wordt tijd versleten.
Inmiddels een aantal sleutels met een eigen karakter.
De bekende Kent en mijn homebrew.
En nog meer...
Overigens... als je wilt kan ik je foto's sturen want niet alles staat op deze site...
Bedankt voor u aandacht.


I use two ball-bearings, so there is less moving of the axle from the left to the right.

In the backside of this key is a space voor wiring and fasting? or fastening? of the two bolds and the ball-bearing.

The backside is finished after i place the lead for aggravation of the key.

Now i must mounting the magnets and the contactpoints.

The home made contactpoints are from the moving part of a relais... nice job don't you think?
Not only a SideSwiper or a Twin-Paddle but also a "Straight Key" is a challenge for me to make.

You see on the left side the magnets and right the contacts from a old relais and soldering? on two brass bolts, one in the base and one in de lever.
In the begining i use a piece of nutwood? but later i use Merbau wood / intsia bijuga?, this looks much nicer.

De RVS parkers die je ziet moest uiteindelijk zowel de lagers als het blokje zelf fixeren (wilde splijten).
Hmm... dat moet beter kunnen vind ik.
Wired and in use, its accustom? to work with de light counter pressure of the two magnets.
The RVS selftappers hold the balbearings and the woden base together to avoid spltting of the wood.
Hmmm.... I think it can much better.

Only must making the wire and this key is ready for use.
Btw, the magnets are adjustable.
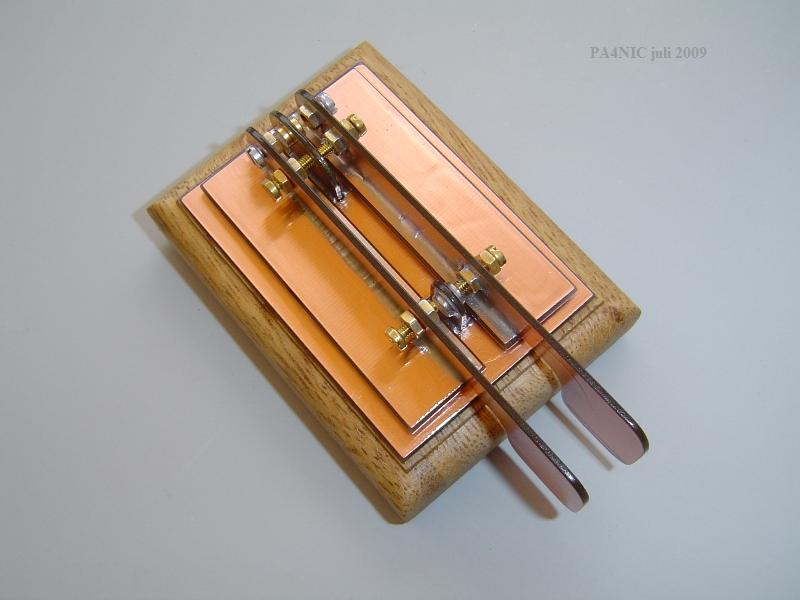
de bedrading en lagers werkte ik geheel weg in het hout. Let op... de as zie je niet (gesoldeerd aan de onderzijde) maar
de magneetjes staan hier experimenteel (voor de as geplaatst) en moeten hier dus afstotend opgesteld.
With a little help of Gerard PA2HLM i was able to make my 3e Paddle.
The ball-bearings light down in line and there is no moving of the axle from the left to the right.
The wiring and the ball-bearings are hidden in the wood.
Look up.. de axle are also hidden Solder? on the back side.
The magnets are here (for experimentel puppose) placed on the oposite site of the axle.
The magnets must be repelling / puch down? not draw / put on? for a good working key.

Deze Paddle voerde ik uit met 1 magneet met daar tegenover een metalen boutje, het veld is sterk genoeg.
Kwaliteit gaat vooruit... deze werkt echt heel lekker en is instelbaar.
Again i make the holes in the wood bij hand but now with two ball-bearings on each bolt/axle and fastened with two components glue, this work good.
In this paddle i use only one magnet and in the oposite side a bold of steel, de magnetic field are strong enough.
The quality of my products is growing up. This key works very nice and is adjustable.

Wanneer je 1 lager gebruikt is er axiale speling waardoor de de paddle iets kan "wippen".
Desondanks werkt hij prima hoor maar ik wil die speling niet!
Here i have try it again with one Ball-bearing, but alas....
When i use one ball-bearing the axial moving from left to the right is there in spite of it the key works good but i will not this axial moving!!!!

Hoewel ik het model mooi vond werd deze toch weer net iets anders.
On account of / on behalf of de axtial moving in paddle (5) i have try this moddel again but with two double ball-bearings?
Though / although? i found the moddel nice but is yet a little different.

When i wired this key and i mount the filling plates, this key is ready for use!
Qua opbouw en afwerking is deze goed gelukt en de contacten aan de paddles (bedien zijde) t.o.v de as
bleek een goede oplossing omdat je daardoor in 1 richting kan werken, ik bedoel er zijn 4 aspecten
(de magneet, het lager, het contact en de aanslag verstelling) waar je rekening mee moet houden (kom je nog wel achter)
deze 4 bepalen mede de vorm van de paddles zelf.
This Paddle is my favourite key, It is my most nice / beautiful key.
I like the place of all parts, especially the place of the contacts versus the axle was a good decision to do so.
There are four aspects for the form and for a good working Key, namely the place of the magnets, the ball-bearing, contacts and the ajusment of it.

Het is een lief klein sleuteltje geworden en ja hij doet het goed ondanks de geringe afmeting.
Waarom in een doosje, nou als je een portable set in een koffer stopt incl. CW sleutel dan beschadig je deze al
snel en hierdoor kwam ik op het idee een beschermend "mini kistje" te maken, lief he!
Jos PA3GDF give it the name "the devil in a box". It is a sweet small key and yes the key works nice in spite of his small size. To avoid damage on this little key when you traveling with all your equipment in a suitcase? to your portable address i build a box arround this key.
(in een boorstandaard), een bovenfrees en verder maak ik het met de hand af.
Now a few details, I use a hand boring tool? in a boring default and a bovenfrees? machine and by hand.

v.l.n.r. magneet, contactpunt, lagerhuis en de hefboom instelling.
The console is created with some precision, from the left to the right magnet, contactpoint, ball-bearing house and the lever setting.

Adjusment of the lever. I make the top of the bold in the wood flat with a file?

You see here the two repelling / repulsive / push down? magnets adjustable with the knob above.
Below a few pictures creating during making the keys.

Just thinking how i should form the paddles by themselves.

Look to this puzzle because it is, of course, is not entirely clear??

Polish with steelwool? and than a transparent layer paint from a "canister under presure with paint"??

Geen paddle op deze pagina is gelijk en dat is nou zo leuk.
Als je goed kijkt zie je een doorverbinding in het linker gat anders blijven de montage boutjes
geisoleerd en wordt de bovenste plaat geen massa.
Closeup of the magnets and indeed to a new location.
No key on this page are the same and that is funny.
If you look good you see a wiring in the left hole to connect de plate above to mass / ground level?

Here the bottom, a layer of lead for some weight and some stability that was my solution.

The first Paddle.... i must thinking for a moment and than at work.
I found in the barn a plank that i can use. The base / bottom can i make from the cover of a jam-jar full of lead or someting like that.
This problem have solved later.

So that fits nice (this is only the begining...)
The magnets repelling / repulsive / push down? each other.
Note, i do not use this in the future because the pressure raise up if you squeese one of both paddles.
(This contacts are made of a old Motorola accu sharger)

Ik plakte hier een strip lood onder en dat voldoet ook (wel rubber voetjes!!).
I place a lead under the bottom and also four rubber foots?.
This paddle working very good, fast and light and this key stay on his place while you use them.

Closeup of the goldplated contacts.
The Next one...

The 2nd paddle brought someting else (like all who folowed hihi).

First of all to tailor and learning of the building. The contacts are of a large relays.
Het boutje met daarop de 2 gemonteerde lagers in één keer (voorzichtig met lijm) het gat in geschoven.
Ball-bearings are now set in two components glue.
The bolts contains the two ball-bearings and mounted at one time (careful with glue) in the holes.

De wiring is engraved and is save for extern pressure.

Working with tact is the advice (to day i use a hand milling-machine?.

I must glue the three pieces of lead neatly and flat, after that i glue four soft anti croll buts on the base.

Nuts and double sided printed circuit board are carefully tailored and manufactured in such a way!

Magnets, bearings, contacts and a pair of stops

Here is room for the wiring. Later i cover this with a few flat pieces of lead and fasten(ed)? it with a few screws.

On this picture you can see how small this key is.

This is who i make de base of the Nic-13 key, sweet heavy.

The wiring of Nic-13.

This is a old Duch expression meaning while the grass grows, the seed starves.
Meanwhile i have now a few keys with there own character.

This is the well known Kent double paddle key and my homebrew key look a like.

And much more

If you like this i can give you more pictures because not all the pictures i made are on this side....
Thanks for your attention / interest
Nico Vermeer, PA4NIC.
Also